> ## Documentation Index
> Fetch the complete documentation index at: https://bunnynet-cb9733c2-database-cli-docs.mintlify.site/llms.txt
> Use this file to discover all available pages before exploring further.
# Joomla
> Speed up your Joomla website with bunny.net CDN using the CDN for Joomla plugin.
Joomla can serve assets through Bunny CDN using the [CDN for Joomla plugin](https://www.regularlabs.com/extensions/cdnforjoomla) by Regular Labs, which rewrites your content URLs to serve them through the CDN.
The free version of the CDN for Joomla plugin only supports HTTP URLs. To use HTTPS URLs, you'll need the paid version.
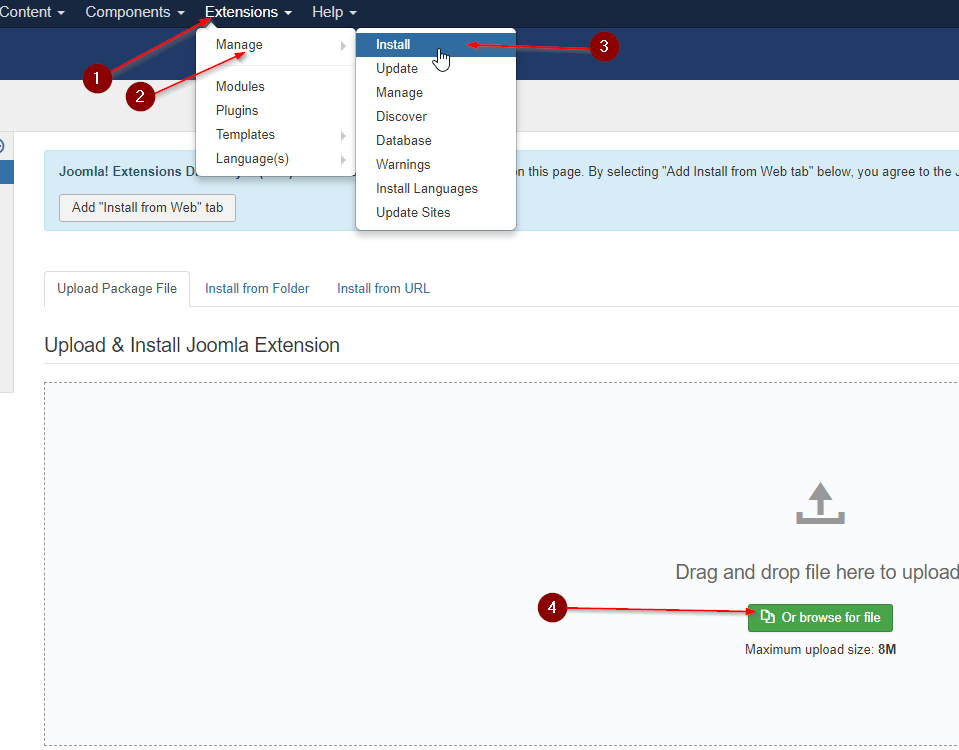
Download the plugin from the [Regular Labs site](https://www.regularlabs.com/extensions/cdnforjoomla). In your Joomla admin, go to **Extensions → Manage → Install**, then upload the ZIP file you downloaded.
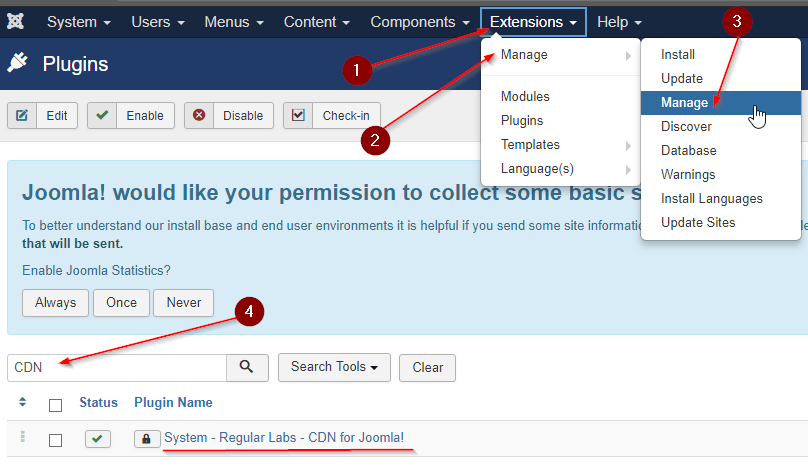
 Go to **Extensions → Manage → Manage**, use the search to find the CDN plugin, then click it to open its configuration page and switch to the **Setup** tab.
 In your [bunny.net dashboard](https://dash.bunny.net), create a new Pull Zone with a name, set the origin URL to your website, choose your tier, and click **Add Pull Zone**. For details, see [How to create your first Pull Zone](/cdn/quickstart).
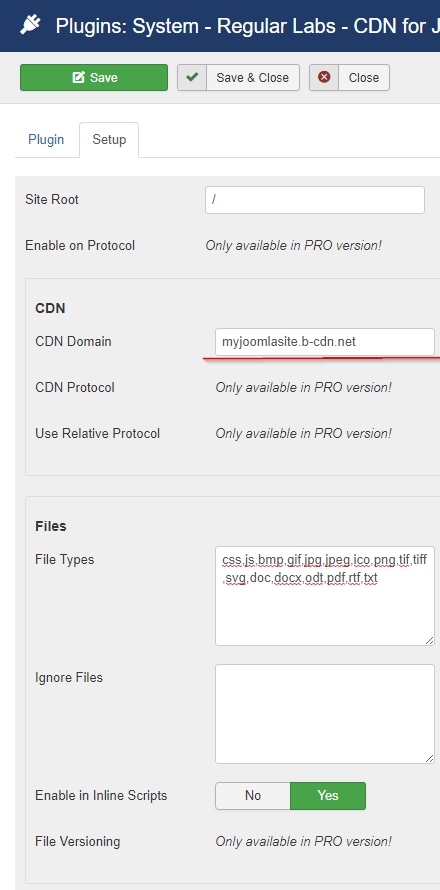
 Back on the plugin's **Setup** tab, enter your Pull Zone hostname (the `b-cdn.net` hostname) in the **CDN Domain** field, then click **Save**.
 Your Joomla site now serves content through Bunny CDN.